|
Homemade Eyepieces
Using techniques described by Chuck Hards in "Woodshop Eyepieces,"
February 2000 Sky & Telescope
Construction Procedure
The illustrations below show the construction of a 2-element Plössl/Symmetrical eyepiece.
Make the Housing
|
|
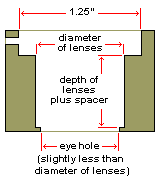
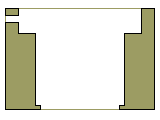
The important dimensions for the lens housing are shown at left. I've used black walnut as the housing material for all of my homemade eyepieces.
|
Bore a hole the diameter of the eye hole through the entire blank.
|
Bore the lens cavity to within 1/16" of the eye end of the blank.
|
Bore a 1 1/4" flange to accept the metal barrel.
|
Bore three holes to accept the screws that hold the barrel in place. (Only one screw hole is shown.)
|
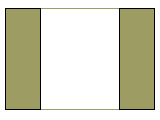
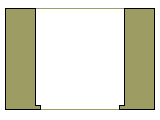
At this point, you should perform any sanding, painting, or other finishing work on the housing. I chamfered the sharp corners, sanded the housing smooth, and applied two coats of clear polyurethane. I painted the inside of the housing flat black and also painted a flat black annulus (ring) around the eye hole to reduce glare.
|
Assemble the Components
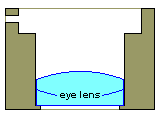
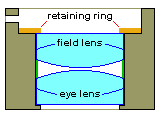
Insert the eye lens. If the lenses in the eyepiece have different focal lengths, you will usually want to use the shorter focal length for the eye lens and the longer focal length for the field lens. This will maximize the eye relief.
|
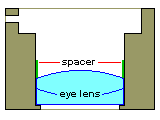
Add the lens spacer. This is a thin strip cut from a sheet of styrene plastic and formed into a ring. Make the spacer just wide enough to prevent the lenses from touching. Usually, the spacer's own spring tension holds it against the inner wall of the housing. You can also use tape to assemble the lenses and spacer as a unit before inserting them in the housing. See the photo on the opening page.
|
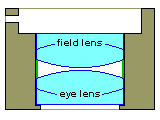
Insert the field lens. It should rest against the plastic spacer and not touch the eye lens.
|
Add the retaining ring. This holds the lenses and spacer securely in place. I cut the ring from thin modeler's plywood and hold it in place with a few drops of white glue. You can see the retaining ring, painted black, in the photos on the opening page.
|
|
|
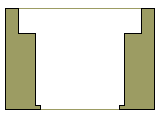
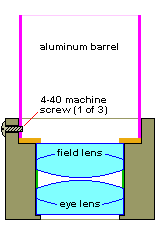
Add the aluminum barrel. The barrel is made from 1.25" diameter tubing and is 1.25" long. I use three 4-40 brass machine screws to attach it to the housing. To assure that the holes in the barrel are in the correct locations, I place the barrel into the housing, and while carefully holding it in place, I insert a pencil into each of the three screw holes in the housing to make small marks on the barrel. Then I drill and tap the barrel at the marked locations to accept the machine screws.
With the addition of the aluminum barrel, the eyepiece is finished!
|
|